Description
If you’ve already been through moving before but might have forgotten a step or 2 and just need a quick reminder of the steps, this section is for you. Compared to the other document this is very brief and to the point.
Prerequisites
We’ll be using the domains example.com and example.org as per RFC.2606 and RFC.6761. You will replace these with your own domain name(s).
- A working knowledge of Linux, Apache httpd or nginx and MySQL or MariaDB
- A working knowledge of hosting environments
- A DBA account on your MySQL or MariaDB server
- Root access on any Linux systems, or administrative control panel access for shared or other systems.
- DNS already resolving for the new domain at the new hosting
Purpose & Scope
As the title says this is a compressed version of the main document, in an effort to provide as simple of a breakdown of this process as possible for the most people. Due to the wide variety of hosting environments it’s simply not possible to cover every possible situation. Because of this reason, this document is written for those who are already familiar with the process and the above prerequisites, have already done it a few times and just need a quick refresher. The goal here is to get up and running as quickly as possible.
If this does not sound like you and you need a more detailed list of instructions, go here.
Description of the Process
Step 1 Dump the database and compress the DocumentRoot
Locate the DocumentRoot of your WordPress install and compress it with the Linux tar command. If you have only FTP use Option 2.
Option 1
tar -cvzf backup_filename.tar.gz /var/www/example.commysqldump -u username -ppassword database_name > database_name.sql
note: If you do not know the database name, look for it in your existing wp-config.php file.
Option 2
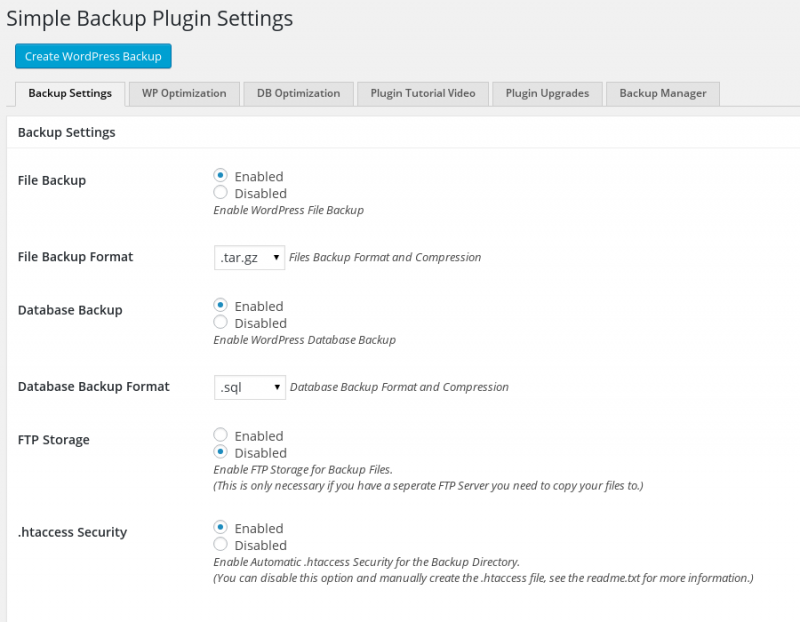
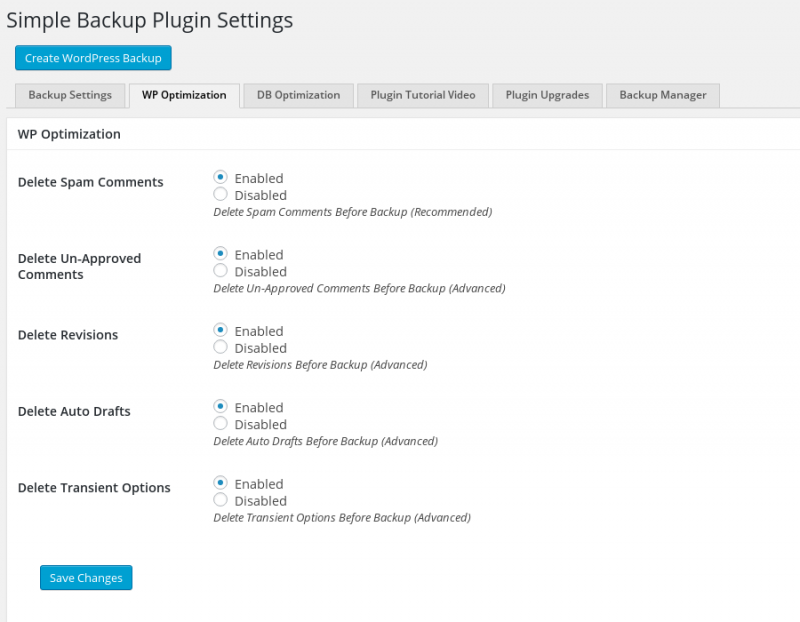
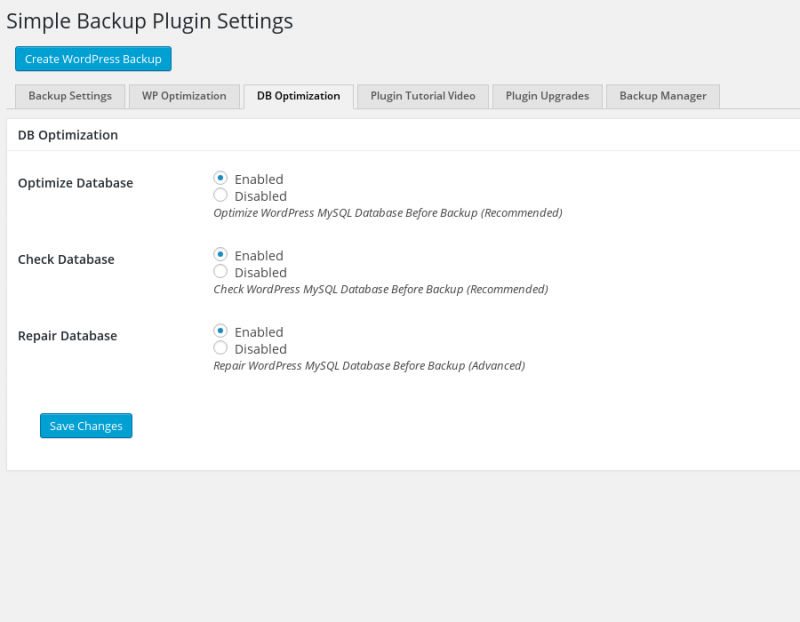
- Install and activate the Simple Backup WordPress plugin.
Configuration
Step 2 Move the files
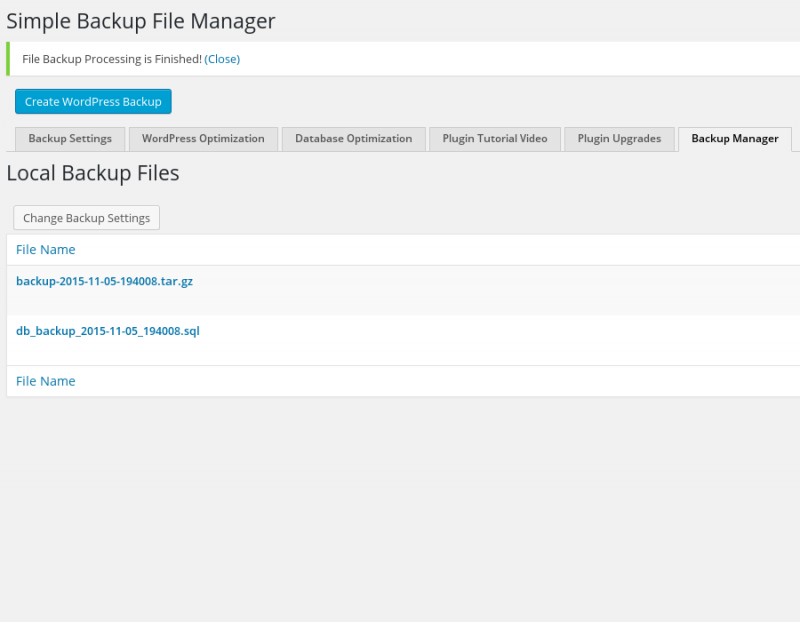
Using FileZilla or any other FTP/sFTP client, login to your old hosting and download the backup_filename.tar.gz file and database_name.sql created in Step 1 to your local computer, or download them directly from the wp-admin and the Simple Backup admin panel.
Once you have them, extract and verify backup_filename.tar.gz has the files you expected then upload them to the new hosting.
Step 3 Reconnecting the files and database
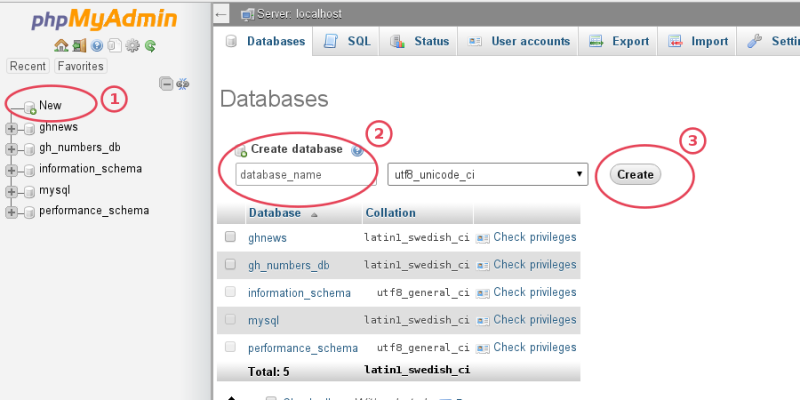
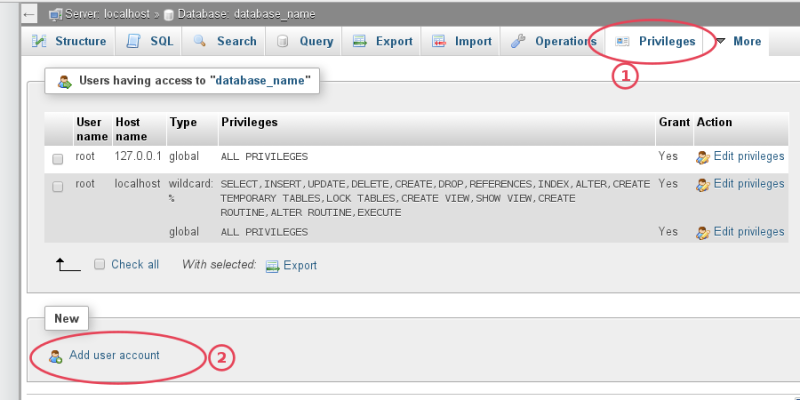
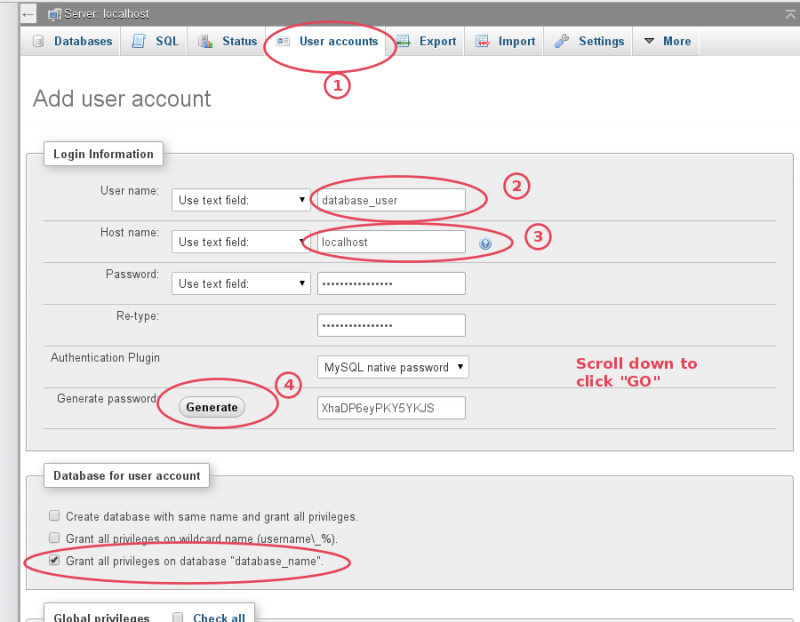
- Create a new database container and user, See Below
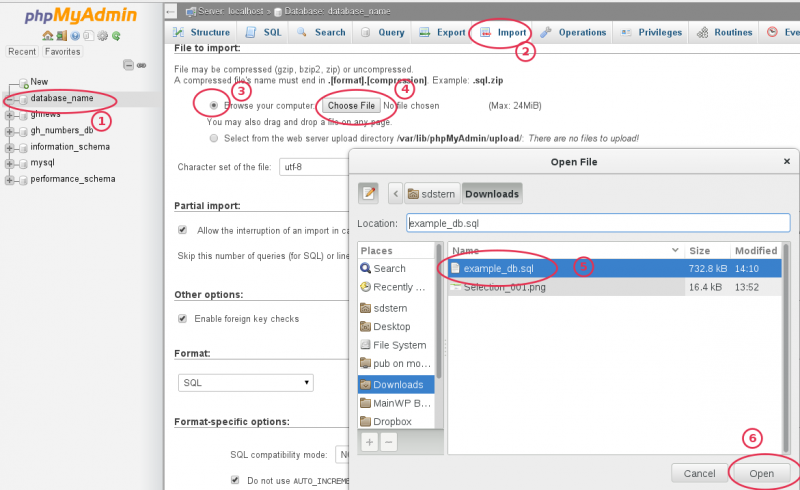
- Import database dump into the new container, See Below
- Untar the DocumentRoot into the new location
- Editing wp-config.php
- Rename .htaccess briefly, read the link to understand what .htaccess files actually are and how to control them.
cp backup_filename.tar.gz /var/www/example.com
cd /var/www/example.com
tar -xvfz backup_filename.tar.gz
Add the following lines to your wp-config.php just above “/* That’s all, stop editing! Happy blogging. */”. Do not put anything below this line or at the very top of the file.
non-SSL/TLS
1 2 | define('WP_HOME','http://example.org'); define('WP_SITEURL','http://example.org'); |
SSL/TLS
1 2 3 4 5 | define('WP_HOME','https://example.org'); define('WP_SITEURL','https://example.org'); define('FORCE_SSL_LOGIN', true); define('FORCE_SSL_ADMIN', true); |
Here you can either omit the .htaccess file entirely or rename it to something like .htaccess_renamed in the DocumentRoot. We don’t want anything in this file preventing us from logging in. Once you’ve completed Step 4 you can rename it back to .htaccess or visit Settings –> Permalinks in the wp-admin and generate a new .htaccess file.
PHPmyAdmin Instructions
PHPMyAdmin screenshots provided by sterndata on Freenode
MariaDB / MySQL Instructions
- Login to MariaDB or MySQL
mysql -p - Create a new database container
create database database_name; - Create a new user for the database container
grant all privileges on database_name.* to 'database_admin'@'localhost' identified by 'strong_password'; - Exit MariaDB or MySQL Terminal
exit; - Import database dump from Step 1
mysql -u username -ppassword database_name < database_name.sql
Step 4 Search and Replace the db media / attachment URLs
If your media links are now broken and you want to get your media / attachments to show up in posts we'll need to do a search and replace on the database, searching for the old domain name and replacing with the new domain name.
Important Note: DO NOT USE TEXT EDITORS or SED for this step, for more information see this section on serialized database arrays.
- Install and activate the Better Search Replace WordPress Plugin


